In this post I am going to show how to use HCX to migrate a single VM from my on-prem environment to VMC on HCX.
Prerequisites:
- SDDC set up and VMC on AWS Functioning
- HCX deployed both on-prem and on VMC on AWS
- Appropriate VPN and firewall rules created
- HCX has been connected.
- Please check here and here to see how to accomplish the VPN, networking and HCX initial setup.
The VM I have at home is a simple Ubuntu 16.04 LTS VM which has had the popular discussion board phpbb3 software installed. I’ve done this to simulate a web server which might be the type of VM which you’re migrating. I’m going to use HCX to stretch my layer 2 network so that I do not have to re-ip the VM. This has many advantages for workload moves as often with more complex applications and workloads, changing the IP address introduces further downtime and complexity, not to mention potentially cost.
First of log into the source HCX appliance with vSphere credentials. In a production environment HCX should be locked down however since this is a simple lab I will not cover that. Once logged in, head to network profiles and create new network profile.
In its simplest form, a network profile maps your on-prem Port Groups to HCX networks and grants IP addresses which are used during the migration. Management and vMotion need to be mapped. You cannot L2 extend a management network port so you may have to consider this if your environment is small and you are running workloads on the management network. Hint – create a second port group with the same settings that isn’t bound to a management vmk! The amount of free IP addresses depends on many factors. Have a look at the calculator for guidance. I’m just choosing 3 addresses as it is ample for one VM.

After the network profile has been created, head to compute profiles and create compute profile. Give the profile a name, this would usually refer to a specific cluster of hosts. On the next screen you’ll see which services are available based on your license here.

Next select your resources. For example in a VCF deployment this might be a workload resource, or for non-VCF it might be web front end resource pool. I don’t have set up so I’ve just selected my ‘old’ cluster.

Next you can apply CPU and/or memory reservation if required. Also select the datastore where the VMs to be migrated are and optionally select the folder. The folder selection may be important if you have locked your environment down based on users and privileges. I just have a single QNAP Datastore selected.

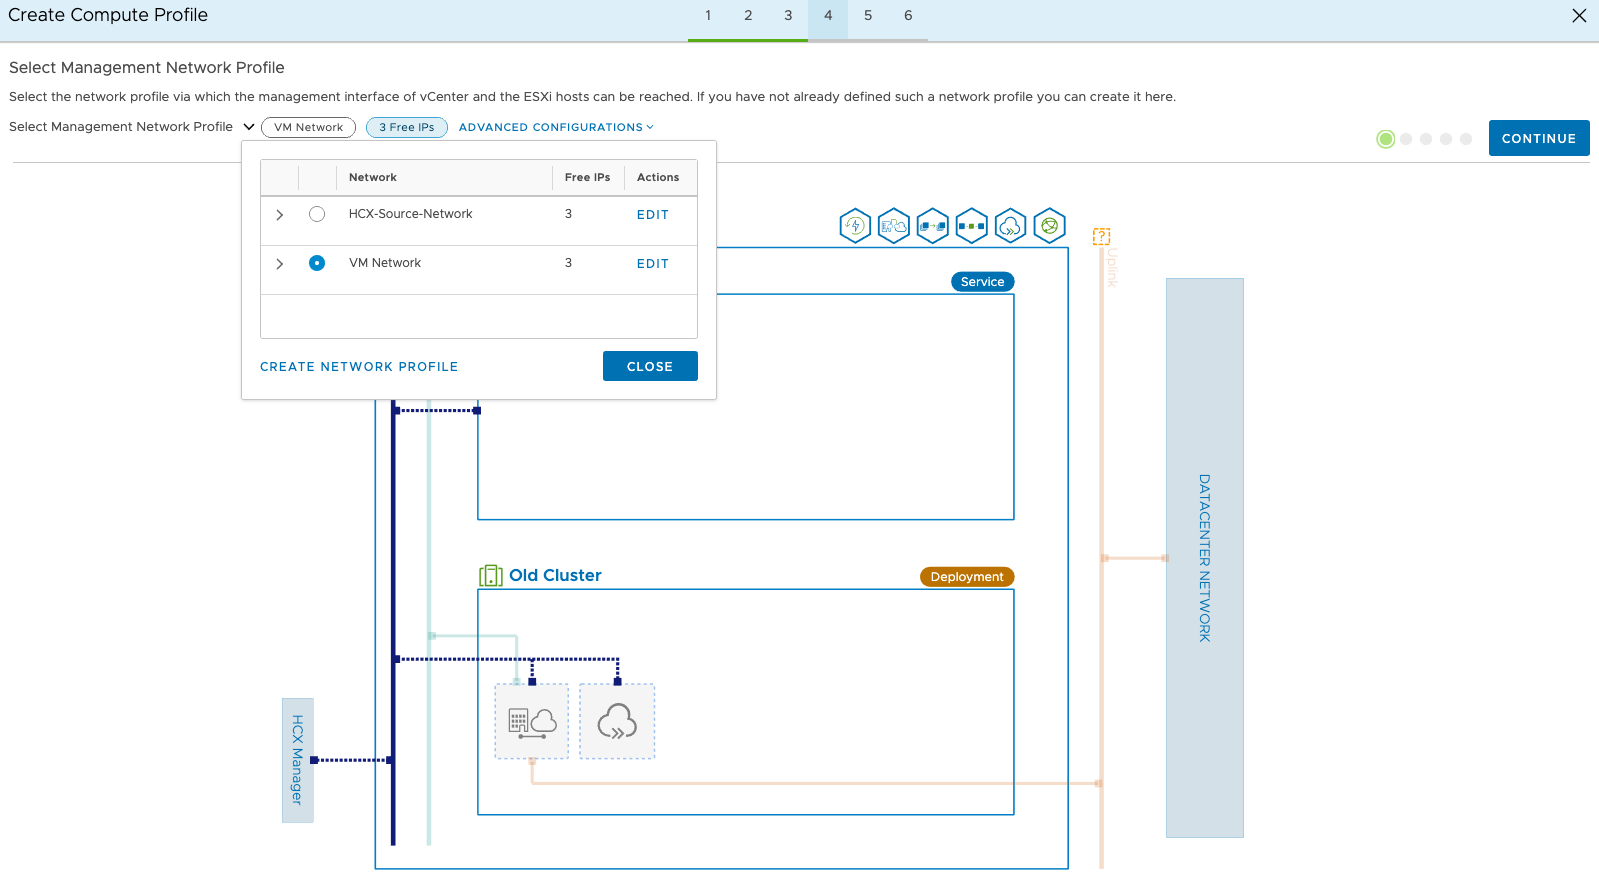
Next we choose the network profile where the HCX management interfaces can be reached. This is usually on the same management network as your ESXi hosts.
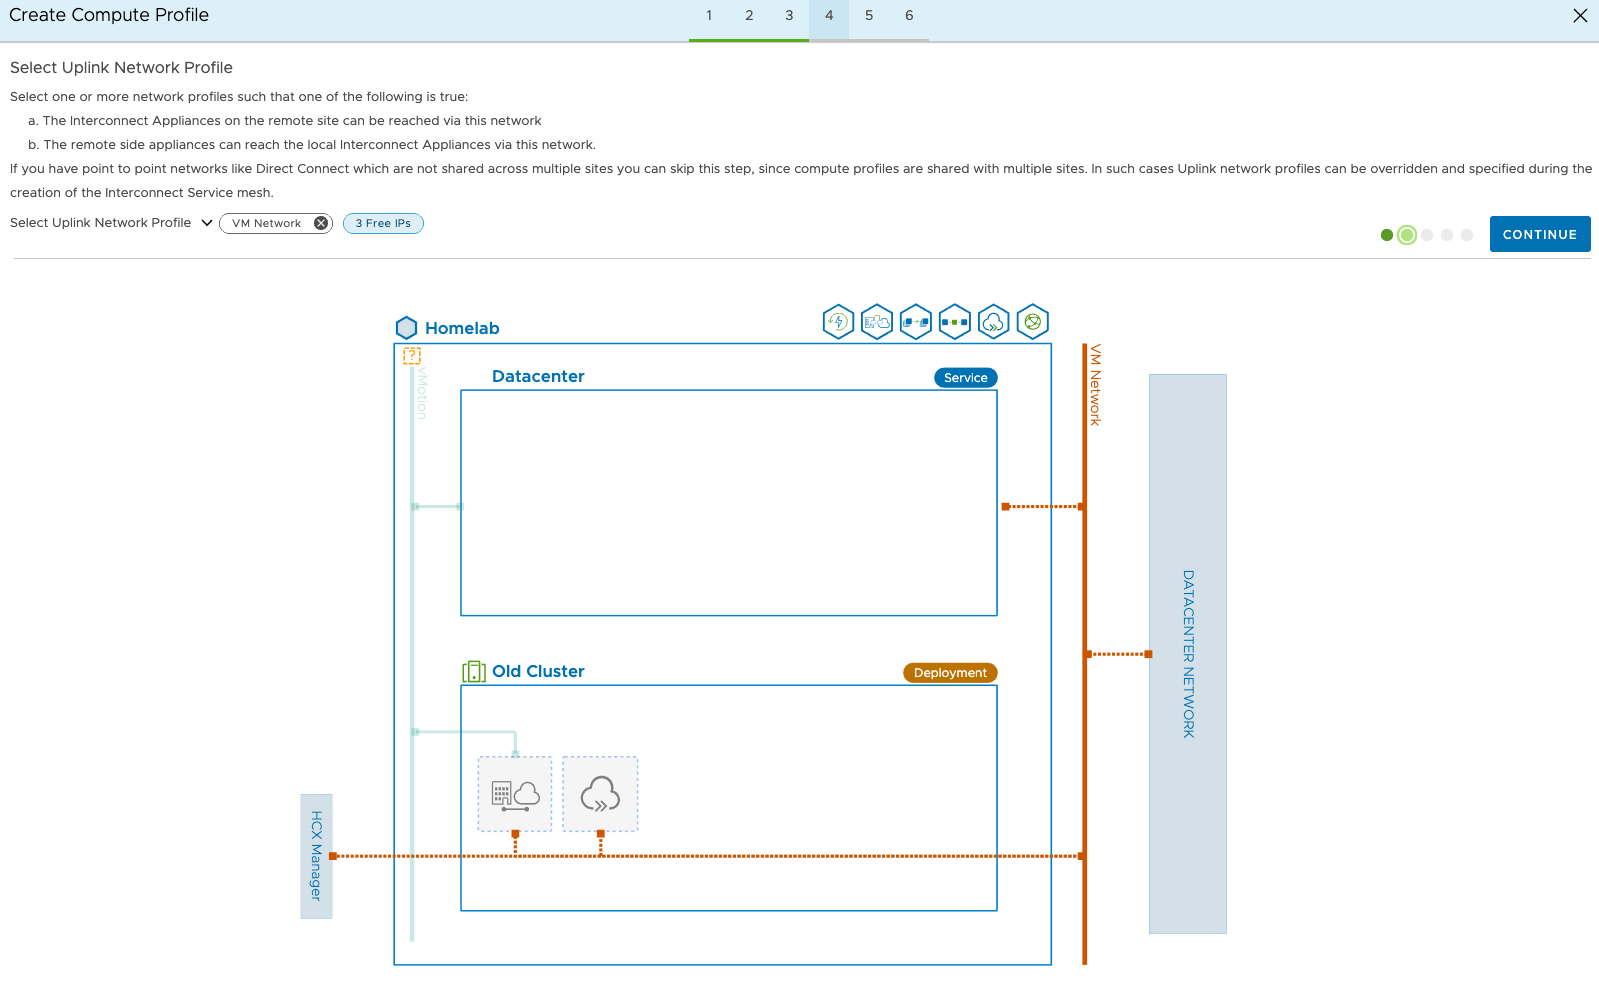
The uplink profile is simply a network which can talk to the remote HCX appliance. In some organisations, not all port groups are exposed to the internet. This would typically be your management network. The naming here comes from NSX-T terminology.
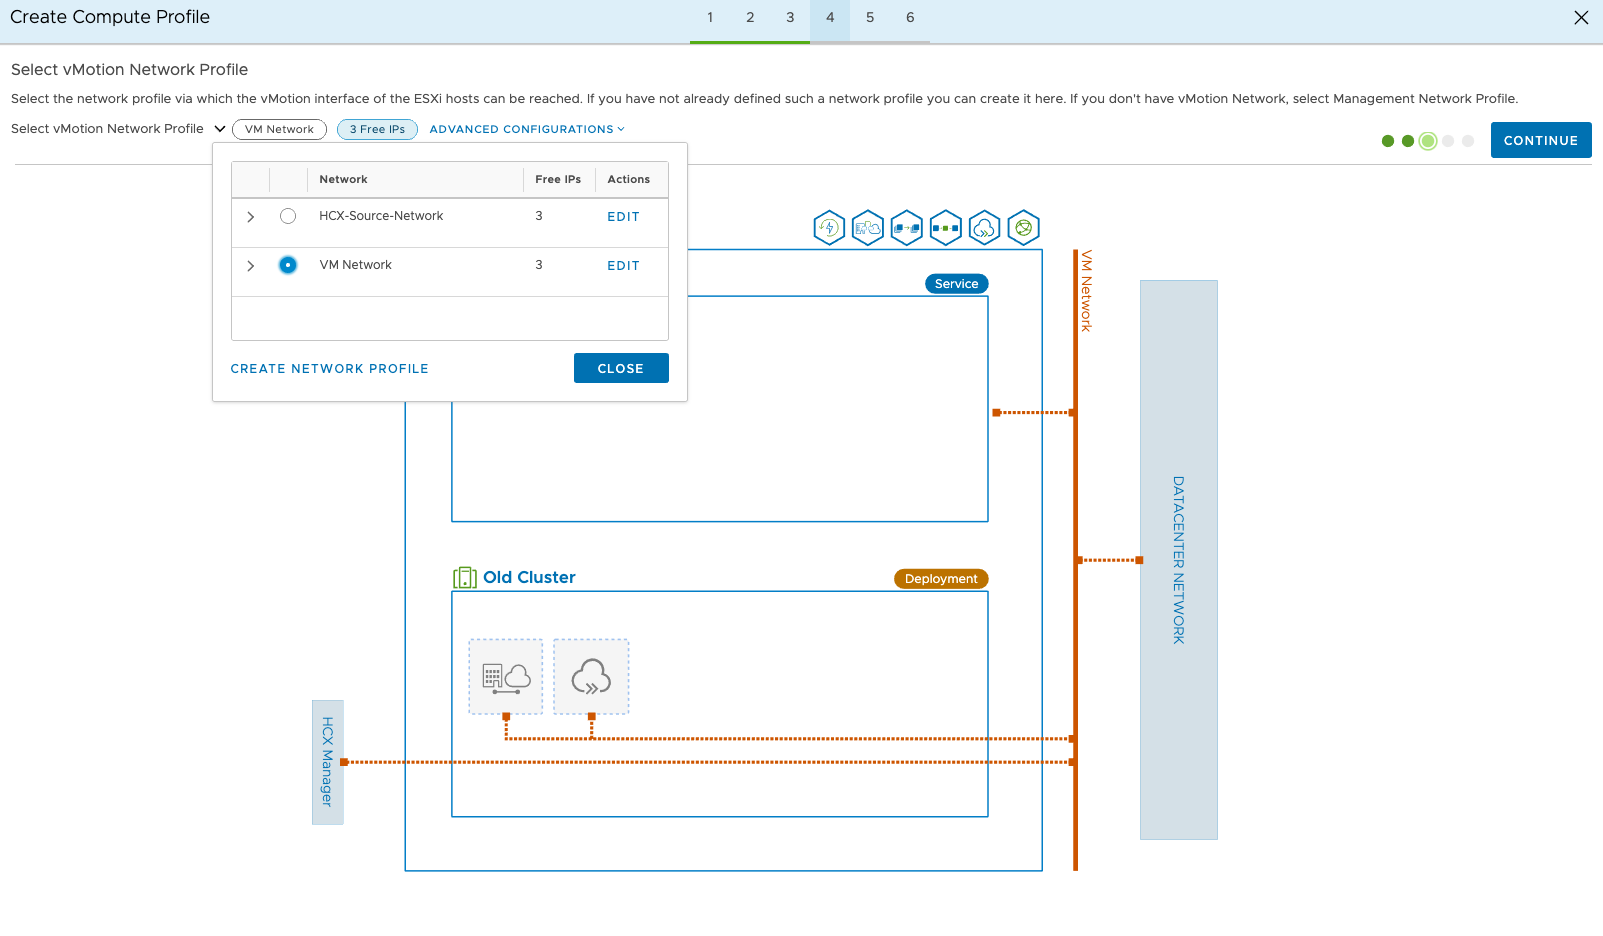
If you are intending to migrate using vMotion, you need to select the vMotion network profile. HCX creates a dummy host on this network to enable vMotion over to VMC on AWS. I can’t live vMotion sadly as my hosts are AMD based and VMC on AWS runs on Intel, although a cold vMotion would be possible.
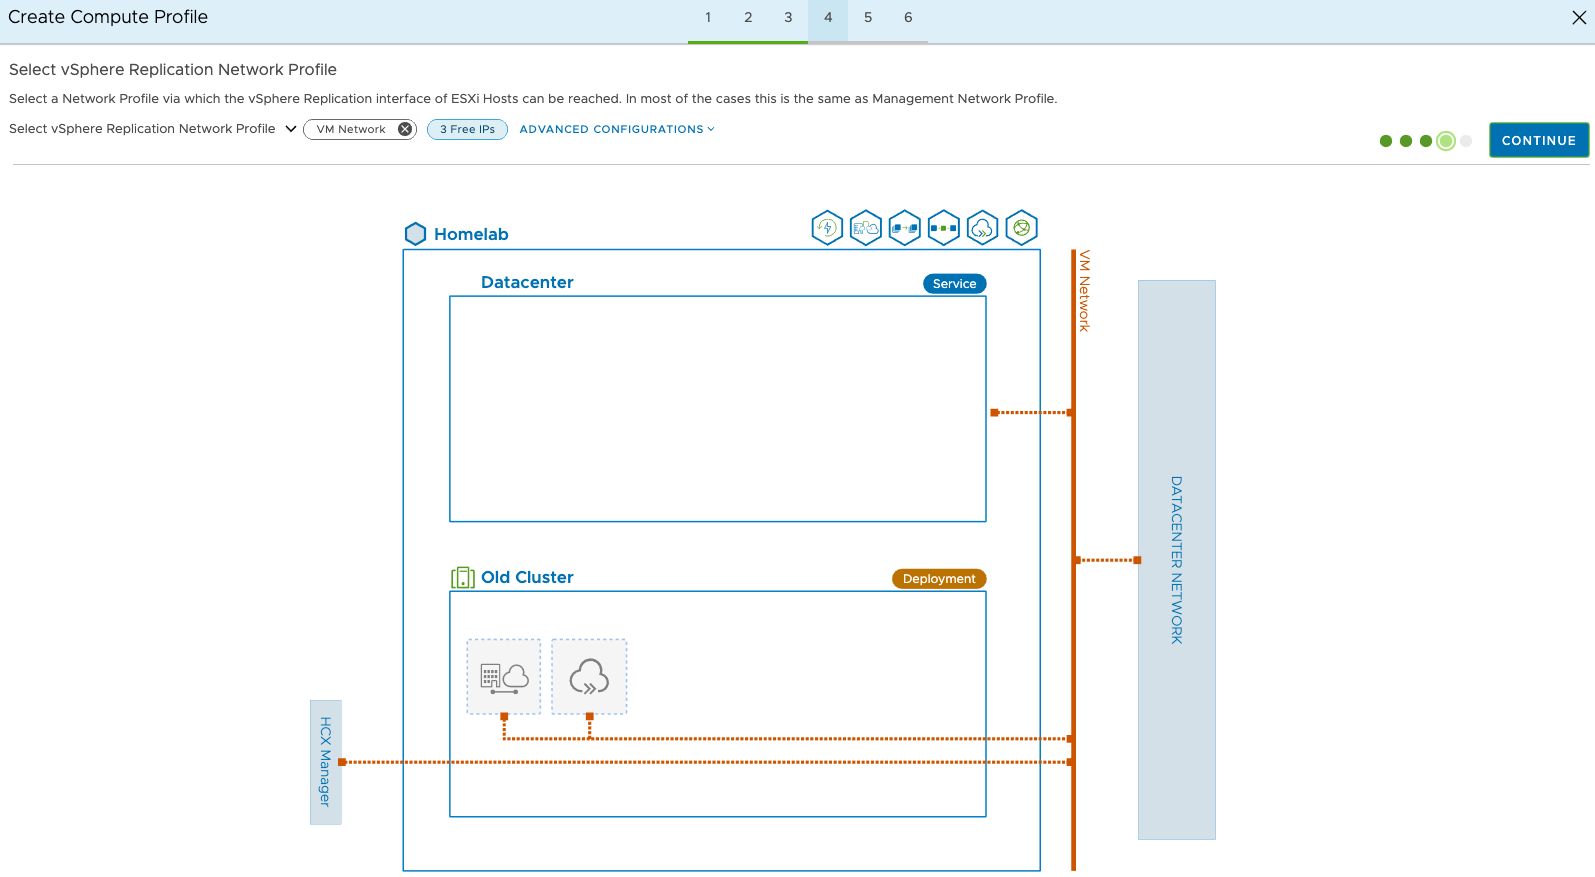
The vSphere Replication network is typically the management network, but this could also have been set up as a specific port group in your environment so make sure to select the correct one. Don’t worry, you don’t have to have vSphere Replication installed, it’s all encompassed as part of the HCX Service Mesh.
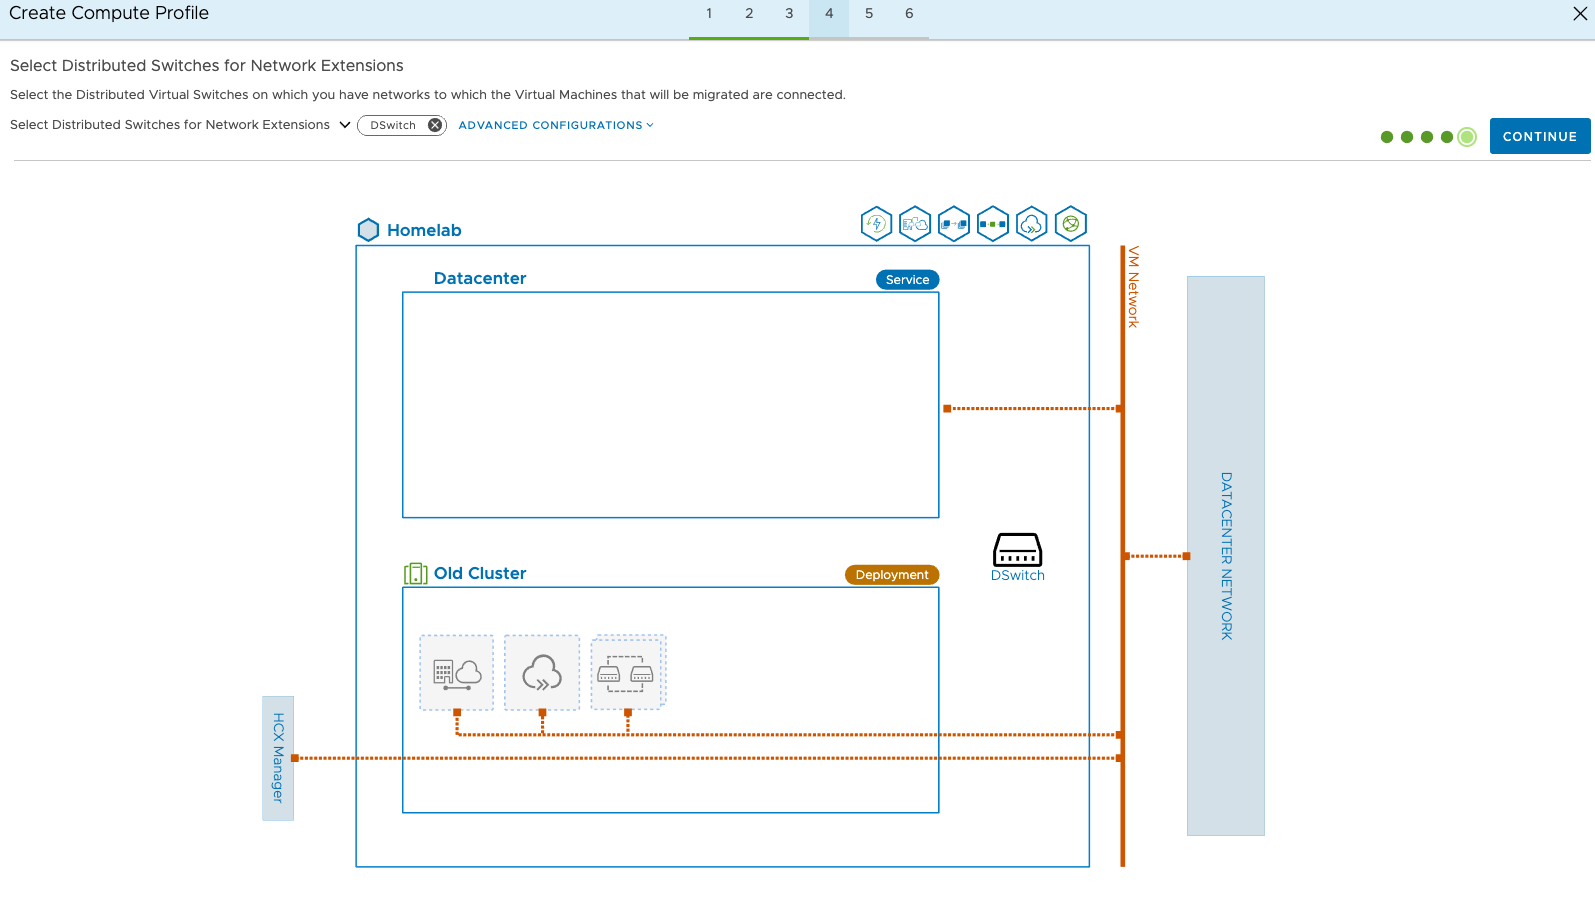
Next we choose which vDS we want to enable for network extensions (L2 stretching). I only have one, so a simple choice.
HCX will then generate some connection rules, these can be used to configure firewalls if necessary. Click continue and finish to complete the compute profile. It may appear quite simple, but if you have 100s of hosts, networks, clusters etc then this can get quite complicated very quickly, so it requires careful planning.
On the VMC on AWS side, network profiles and compute profiles will have already been completed as part of the initial deployment of HCX. Another extremely cool feature of VMC on AWS!
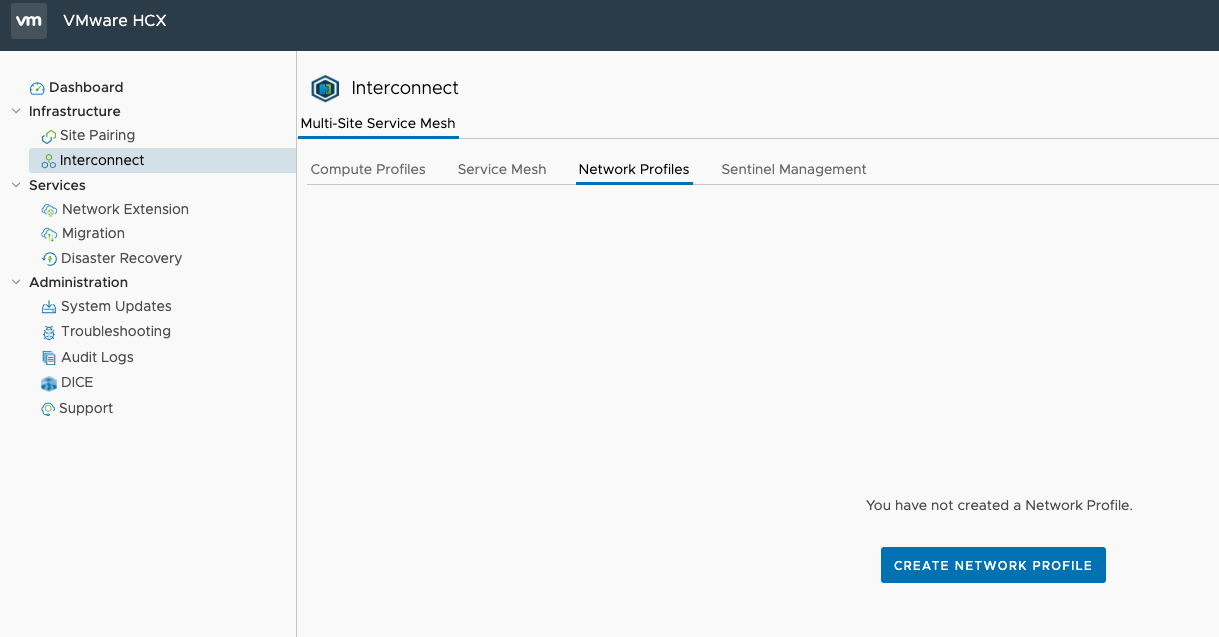
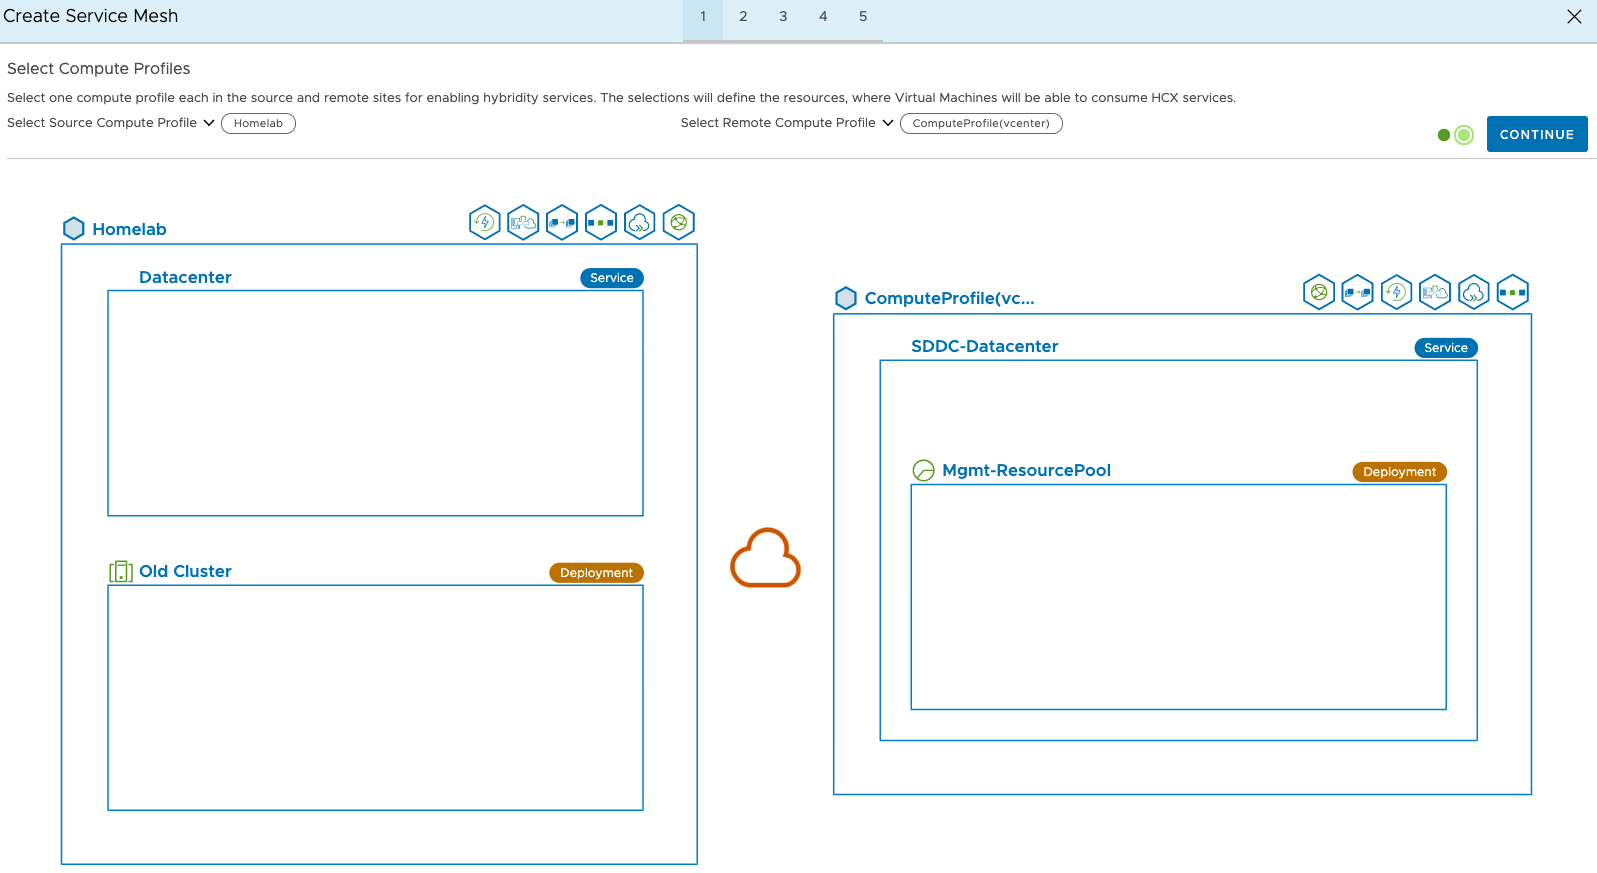
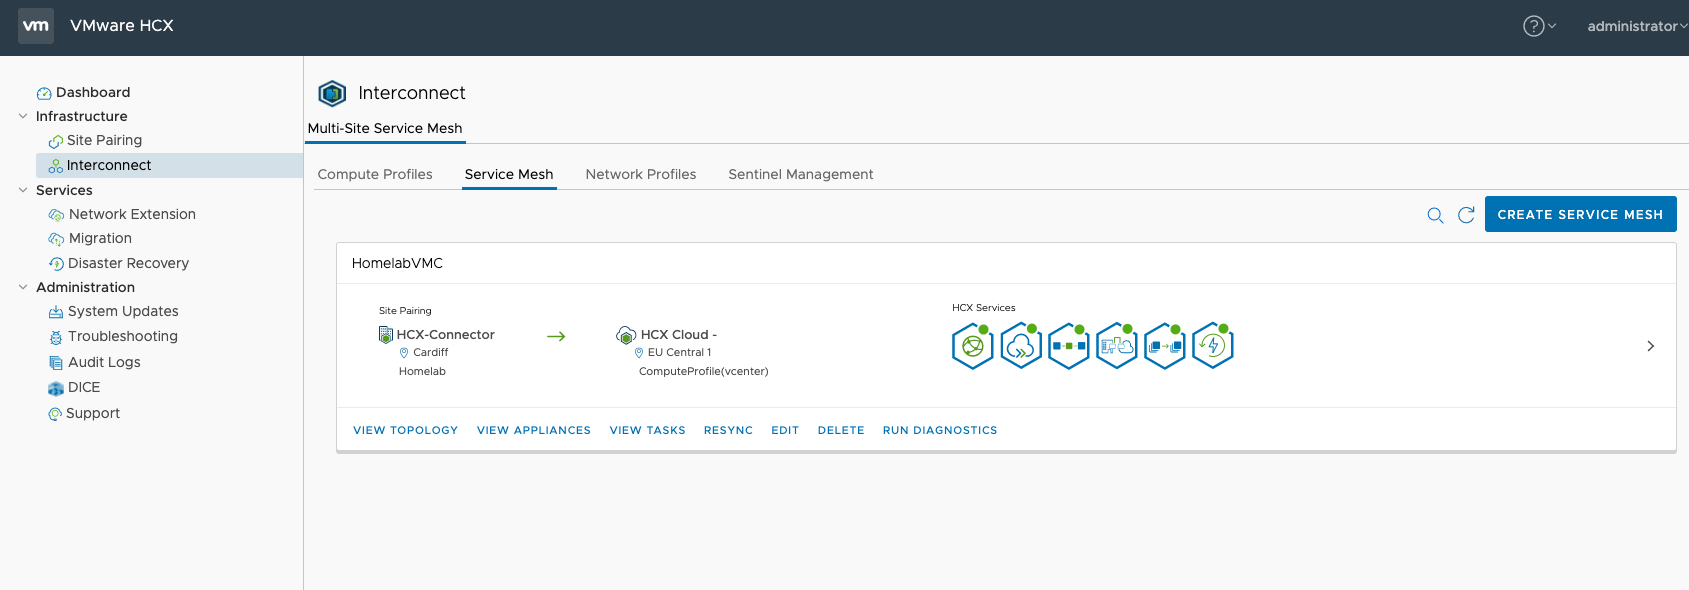
The next step is to create a service mesh. As a rule of thumb, always configure on the source side! The mesh maps the profiles of HCX between both sites effectively creates one single HCX mesh configuration for source and destination sites. Creating the mesh will deploy the HCX Interconnect (or IX for short), Network Extension (NE) and Wan Optimisation (WO) appliances.
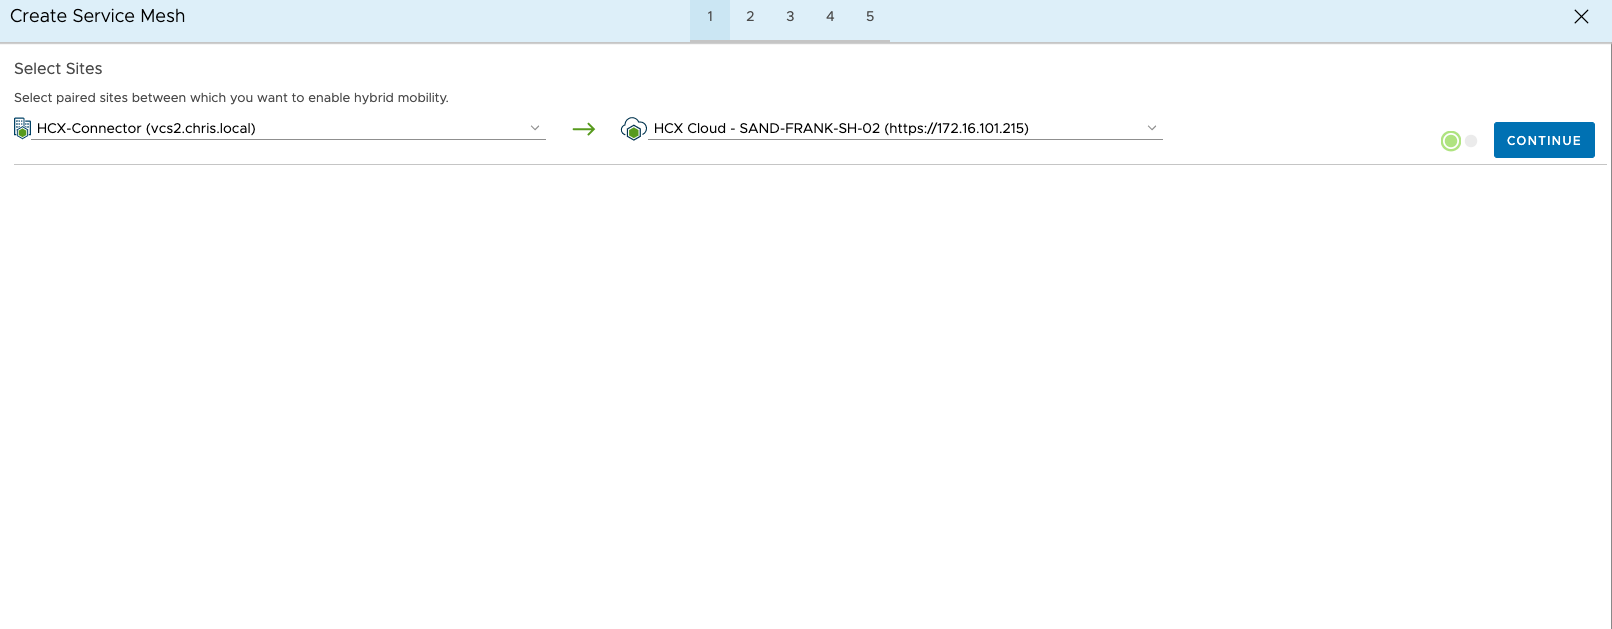
You’ll be shown an overview of how the mesh will connect, ie, source to destination. If you try this on the VMC side you’ll see an error. Next select a source and remote compute profile. Again, this can be quite complicated for large environments, where you have 100s of compute and network profiles. For me it’s quite straight forward.
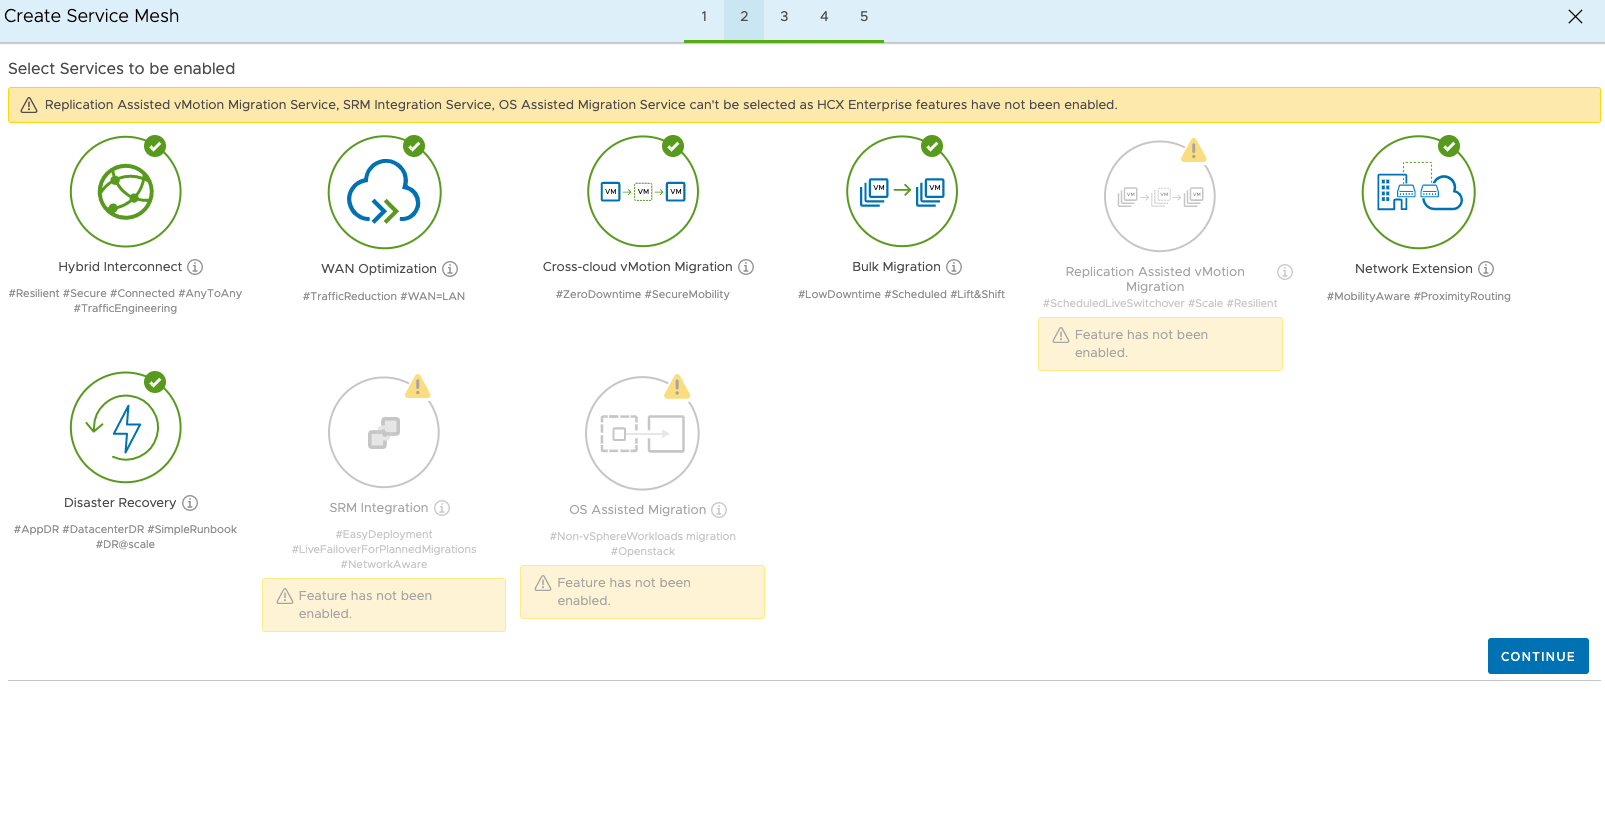
For the services, I’m just going to go with the default setting. I’m only going to use HCX to do a bulk migration of 1 VM for demonstration purposes.
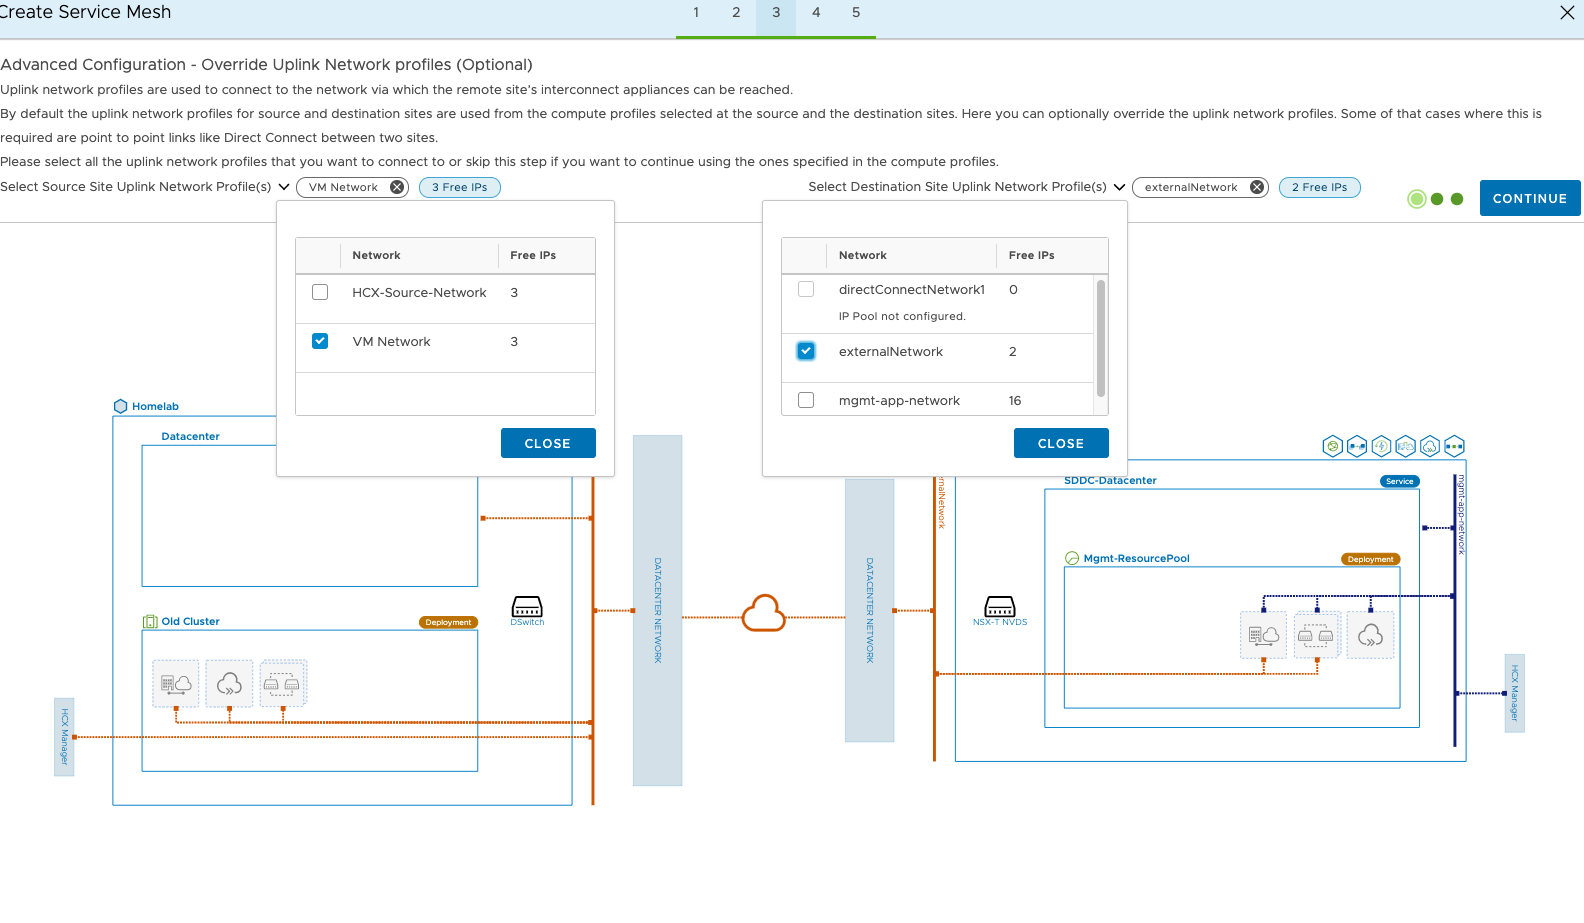
The next step is to confirm the uplink profiles. I’ve overridden them as, well, I forgot to check what the uplink profile was in AWS so wanted to make sure.
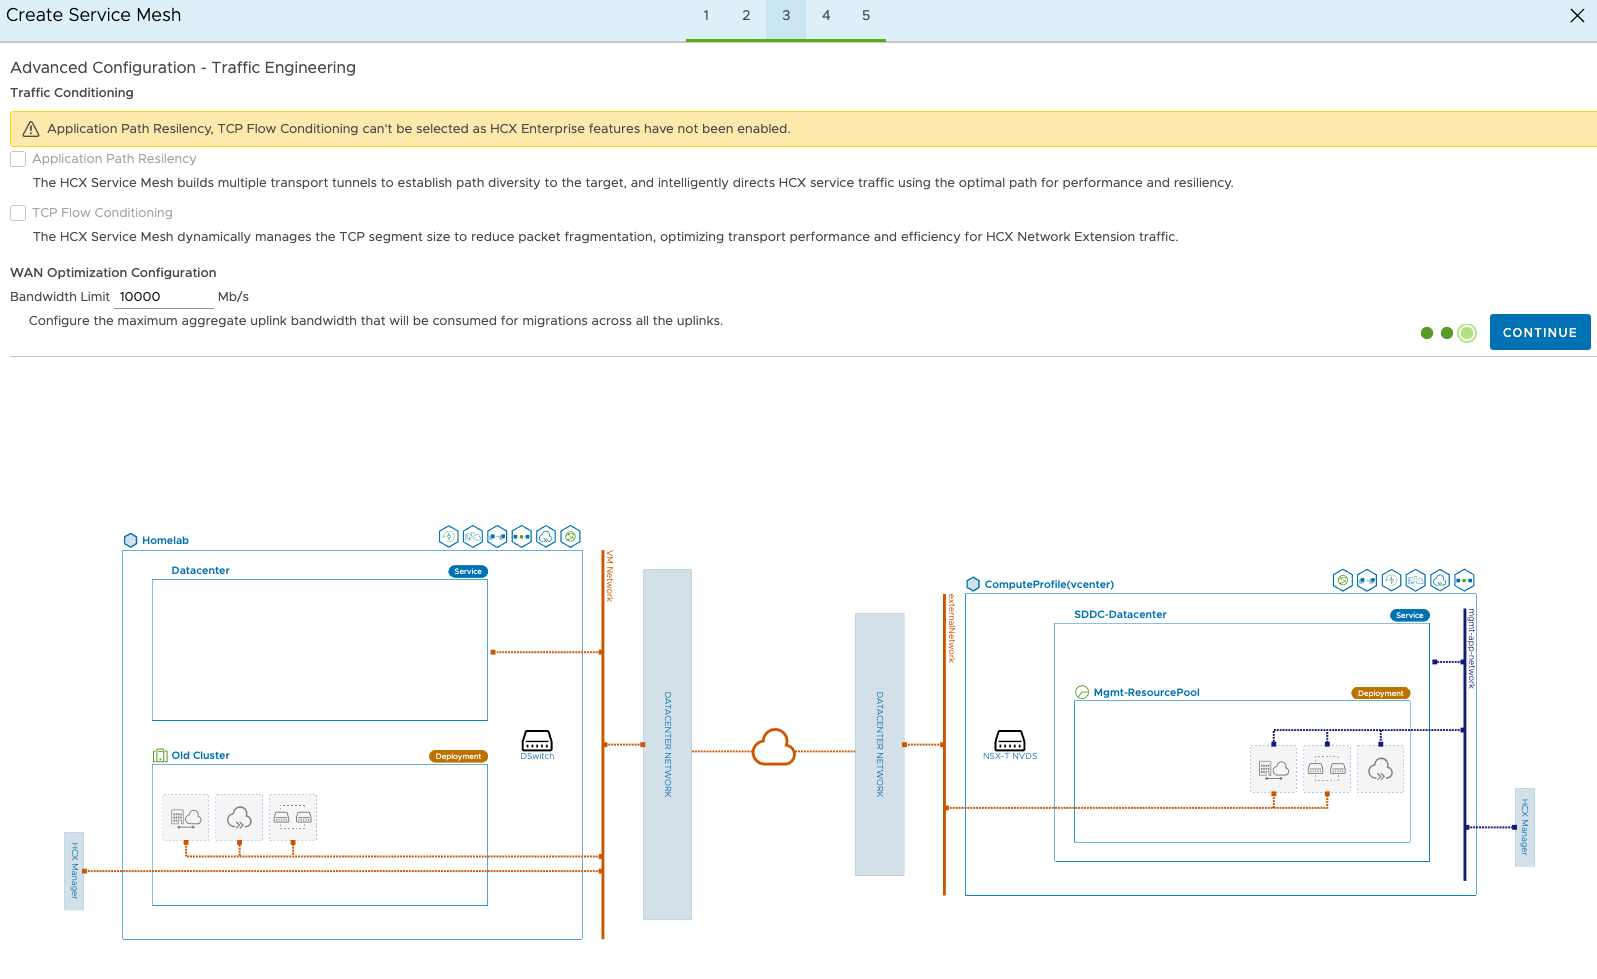
We can have more Network Extension appliances per vDS if required. If there are many port groups this may be worth considering.

Limit the traffic here if you don’t want the replication to eat up all of your bandwidth.
Next review the mesh, give it a name and finish.

It will take some time as several VMs will be deployed at both ends. When the deployment finishes, you should see all services on the mesh are green:
In this example as previously explained, I am going to stretch layer 2 so that once my Ubuntu VM has been migrated, I can access it via DNS and/or the same IP. To do that, I need to enable a Network Extension. Head to Network Extension within the HCX manager and select Extend network. Then select the source network port group and enter the default gateway and subnet length. Then extend and it’s done. This can also be done in the vSphere UI, but since HCX can be used with very old versions of vSphere, I like to use the appliance interface for everything.
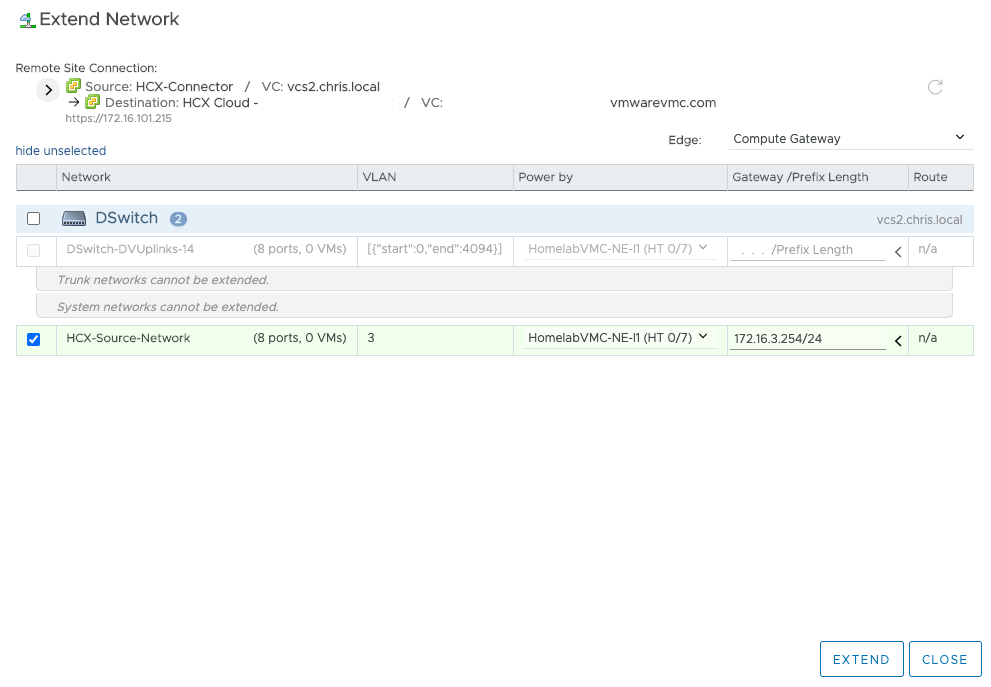
It will take a few minutes to extend the network. If you head into your SDDC on VMC on AWS, you’ll notice that it will have automatically created a new network segments called L2E_HCX-Source-Network-guid, this is the network where the migrated VM will reside once it’s migrated in VMC on AWS.
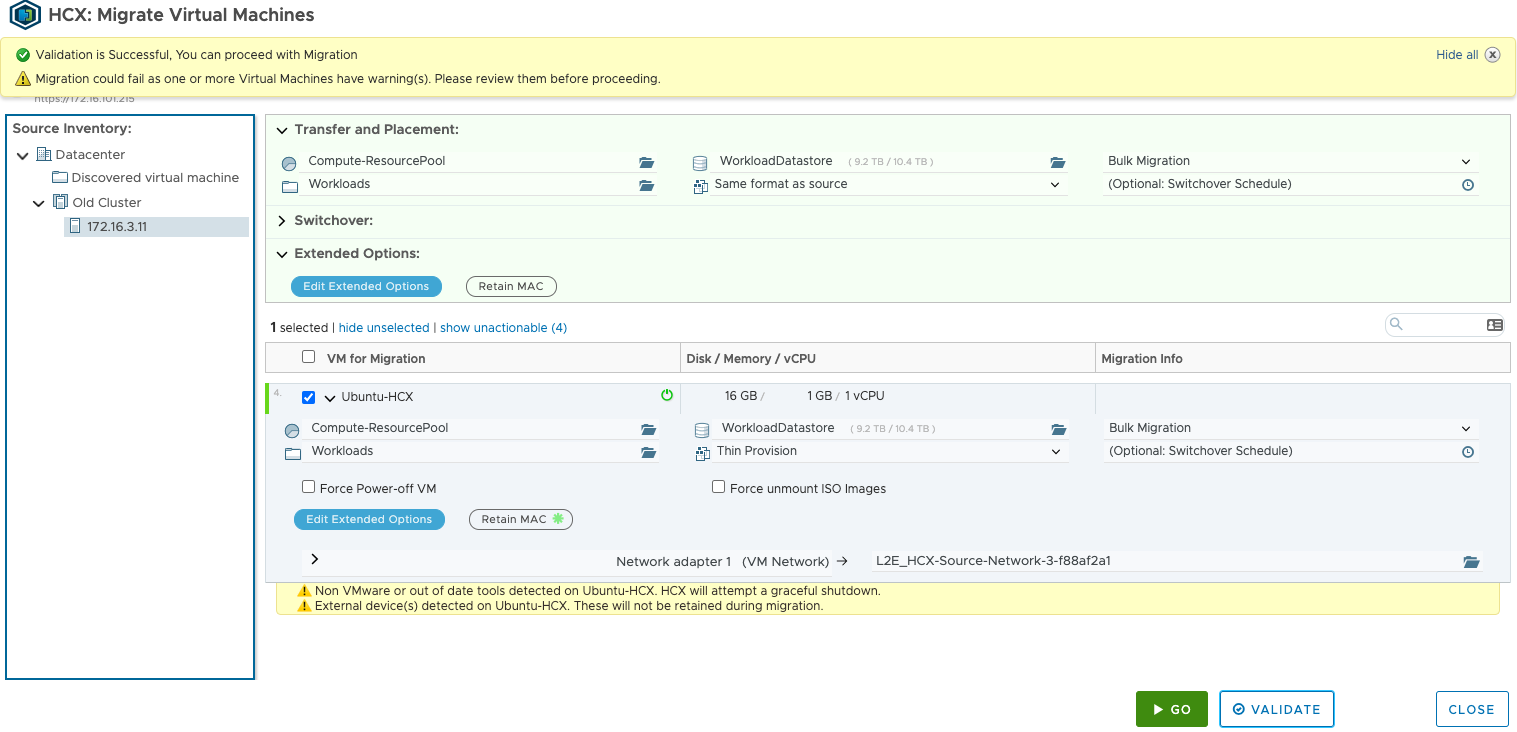
Next head to Migrate within HCX Manager and press the Migrate button. Within here, find your source VM and then set up the placement so that it will be migrated to the compute resource pool and workload datastore within VMC on AWS. You won’t be able to migrate it to any Management based pools or datastores as these are restricted. On the top right there is the migration method, I cannot choose vMotion as I have an AMD host at home as already discussed. You can then schedule the migration, so for example HCX will seed the VM and migrate within the scheduled time, or in my case I am simply choosing ‘go’ and it will switch it over once the data has seeded. There will be a small amount of downtime for the application as the VM will be renamed and shut down on the source side, then powered on at the destination. The last step is to select the destination network, which will be the segment which was created when the port group was extended. It’s worth running the validation check until all critical errors are cleared. It might error if the source VM is thick provisioned as VMC on AWS will only accept thin provisioned VMs as an example.
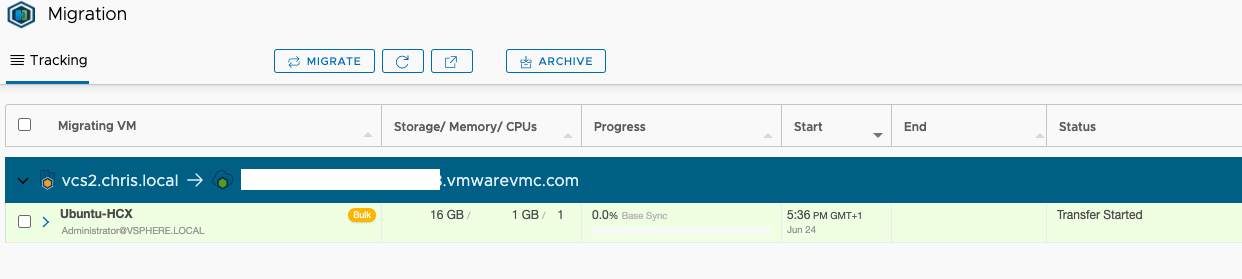
Without stating the obvious, the amount of time it will take to migrate depends on many factors, mainly the WAN connection speed, disk performance and size of the VM. Under Migration within HCX manager we can see the progress:
Once the migration is complete you will see it in your workload resource pool on VMC on AWS.
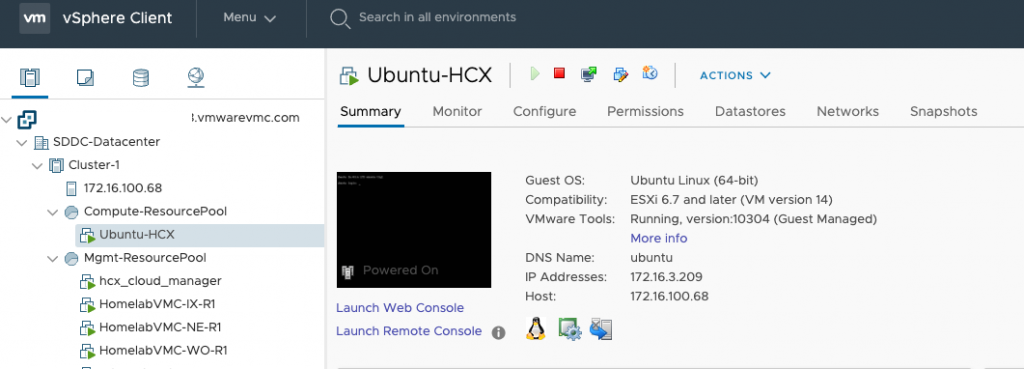
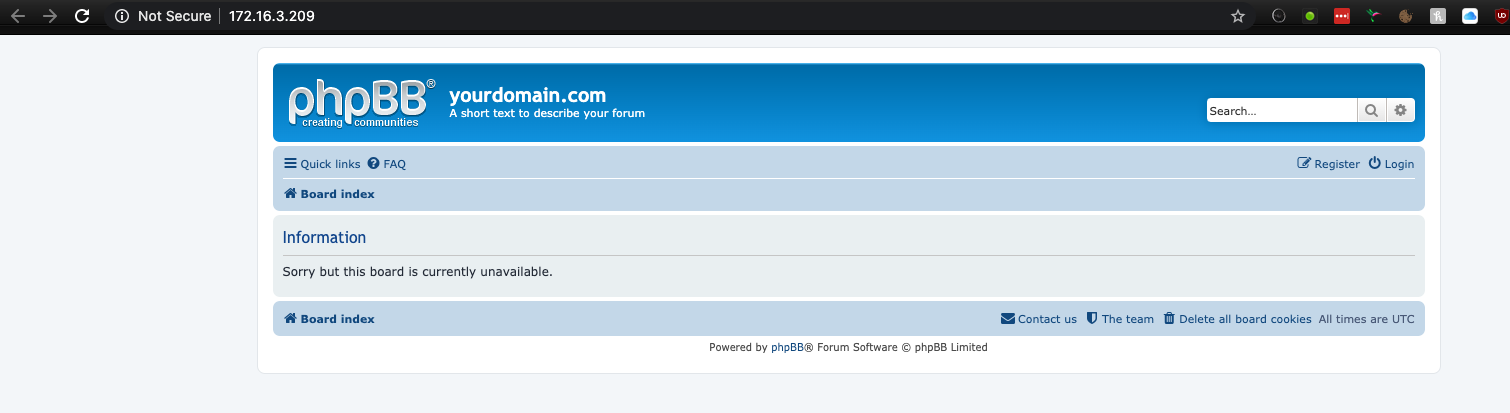
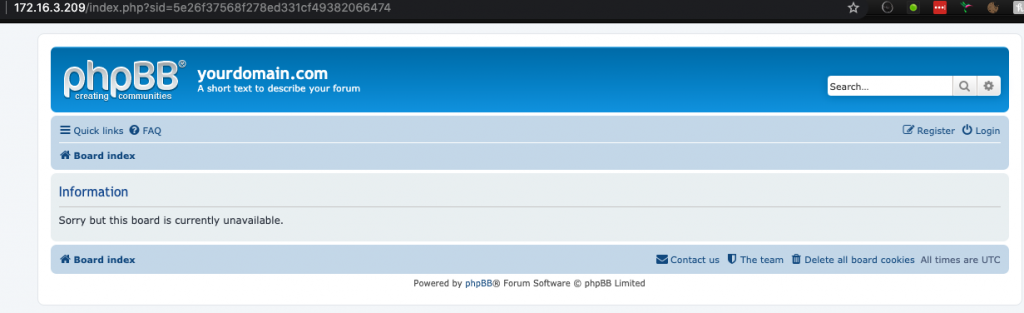
And checking the application we can still it’s working fine on the same IP as above.
And a ping shows around 21ms compared to the previous sub 1ms time.
64 bytes from 172.16.3.209: icmp_seq=1085 ttl=63 time=0.829 ms
<outage>
64 bytes from 172.16.3.209: icmp_seq=1212 ttl=63 time=21.582 ms
I hope this post has been useful. I’ve only scratched the surface of what HCX is capable of, it is an excellent tool for DR and migrations, which doesn’t expect hybrid or enhanced linked mode and it works all the way back to vSphere 5.5. It’s become the tool of choice for many large organisations as it simplifies what can be a very complicated migration process between cloud environments.
And as a final point, HCX under the skin is a complicated product, I have only skimmed on the technologies it uses and I may expand on that in a future post. The idea behind this post was to help administrators with the fundamentals of starting their cloud migrations of workloads from on-prem environments to VMC on AWS.